Wednesday, June 4, 2014

Class Reflections

               My favorite project that I did in this class was the egg drop. I liked it because mine turned out really well and it was different from something that everyone else did and something different than what I normally do. It got me thinking the way that I needed to be thinking so that I could use the design process well and think outside the box.
                                                                 
              I really liked this class because it was really something different and it really got you thinking about all of the different ways that you can solve a problem, and it got you to think more deeply about the problems presented. If I were to change one thing about the class is I would have there be more choices of projects during the first two project so that less people are doing the same project so people think more differently and there isn't the same designs for a project.
             This class has really gotten me to think and look differently about different problems and how to solve them. I also learned how to use the design process to solve problems. This class really got me to look deeper into the problem to find the right answer to fix it in the most efficient way.

Friday, May 30, 2014

Popsicle stick bridge/ Seismograph

Title Page Project Explanation - For this project, i had to create a bridge out out of popsicle sticks that could support some weights. I also had to make a seismograph that could record some movement from a small movement to a big one.
Technological Concepts - The technological concepts in the popsicle stick bridge were compression, tension, torsion, and shear. Compression squeezes them  together, tension pulls them apart, torsion twists the material, and a shear causes parts of the bridge to slide past one another in opposite directions. The technological concept for the seismograph is the Richter Scale, which measures the magnitude or strength of an earthquake.
Learning Goals - The goals for this assignment were to create a stable bridge that would look good and support as much weight as possible. We wanted to use as many popsicle sticks in the bridge as we could so that it could give it the most strength possible. The goal for the seismograph was to make something that could record the movements and be able to differentiate between the forces. 
Description - For our bridge, we had to use 120 popsicle sticks or less and create a unique design that would be able to hold as much weight as possible being put on top without it breaking.

Description - For our seismograph, we hung a pencil on a hanger from wood and placed a piece of paper under it to record the movement. We also glued on a weight to the pencil so that it would be heavier so that the pencil could be seen on the paper so that it would record the movements.

Positive Feedback - Our bridge ended up looking really cool and it performed well, too.
Redesign - i would probably do the same thing for the bridge but i would design a different top and bottom. for the seismograph i would have tried a completely different design because the one that we did didn't work very well
Technological Resources - Every thing we used in both projects were found in the room. For the bridge we had 120 popsicle sticks and glue to use. For the seismograph we used scrap pieces of wood, tape, a hanger, a pencil, paper, and a weight.
Biggest Challenge - The hardest part of the bridge was getting everything to lie up so that the design worked the way that it was suppose to.;The biggest challenge was getting the pencil in the seismograph under control so that it would actually make a mark on the paper and record the movements. When it was attached to the string, it just swung around randomly, but when we used the hanger, it was more stiff so it had better control when it was being shaken.
What I Learned - In this assignment, I learned that it is very difficult to make a seismograph and there are unexpected complications in every project. 

Thursday, May 8, 2014

Mouse Trap Car

Introduction: For this project we had to design a car that could be powered by a mousetrap. We were  somewhat limited to the materials that we had  to work with but if we could find something that would be useful then we could use it.

Technological Concepts: The main thing that we had to consider when we were designing our vehicle is how big of a wheel we wanted. If we had a small wheel then it would spin faster propelling the car forward with decent speed, or we could go with a bigger wheel that would turn slowly but would cover a lot of ground with just one spin of the axle.

Learning Goals: one of the learning goals there was for this project was to learn how the different size wheels would effect the car when the axle is turned. 

Design Brief: we decided to go with the small wheels so that when the mousetrap is let go the car would build up speed so that when the mouse trap has stopped then the car will continue to coast along and gain more distance. 
Positive Feedback: I liked this assignment because it helped me learn how to fix problems that keep coming up for different reasons. It also helped me work better with the trial and error process.

Redesign: I f i were to do this project over again i would try to get lighter material so that the car has less mass to weigh it down. I would also get a material that is more smooth to set the axle on so that there is less friction on the axle so it could turn easier.

Technological Resources: we used the materials given to us and shaped and put together our mousetrap car with the machines and tools in the lab. me and my partner also used a computer to look up and resarch different designs.

Biggest Challenge: The biggest challenge for me was trying to deiced what design I wanted to go with  because I didn't know which one would work the best. this lead to me half way through restarting so that the car could be lighter.

What I Learned: something that learned in this assignment is how the size of the wheel can effect the speed and distance.

Tuesday, April 15, 2014

The Egg Drop Project

Introduction to the project: for this project we had to make a contraption that would protect an egg when it was dropped from a specific height. for the  first drop we had specific materials that we had to use, for the second drop we could use any materials as long as it was under a specific weight an size.

Technical Concepts:we had a couple things to consider when designing our contraptions is how will the egg be stopped so that the force docent break. we tried to slow the egg down so that when it hit it would be as soft of a landing as possible.


Learning Goals :One of the learning goals was to learn the design process and the other is learning the relationship between force and acceleration and how they are related and affected by each other. 


Design Brief Mini Drop: our design for the mini drop was to have a padding under the egg to absorb some of the impact when it hit the ground. it had a small parachute to slow the egg down before it hit the ground. lastly it had rubber bands that held the egg in place. 


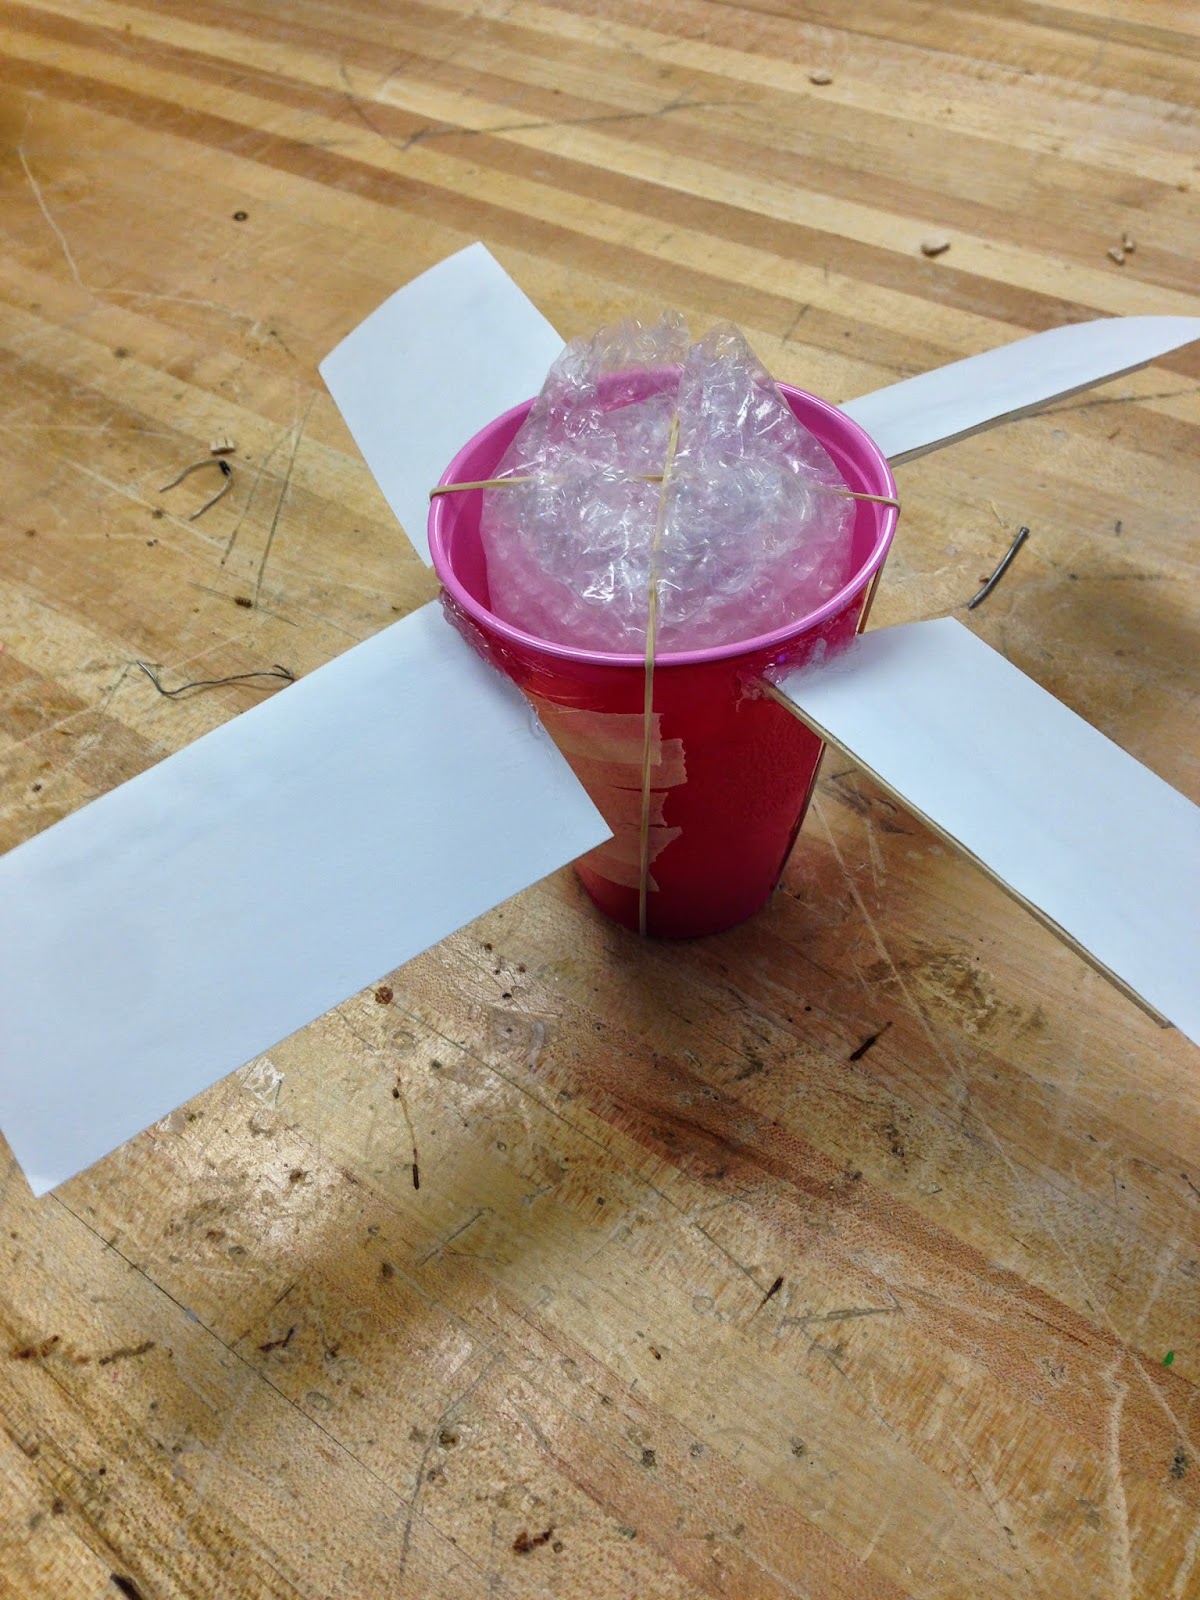
Design Brief Big Drop: For the big drop he had a cup that had padding all around the sides and marsh mellows at the bottom to absorb the fall on the sides were wings that when dropped spun and slowed down the egg before it hit the ground so it would have a soft landing. Finally we had rubber bands holding the egg in the cup. 


Positive Feedback: i liked this assignment because it helped me understand the design process and it was a good way to get thinking about different way that problems can be solved.

Redesign:If i were to do this assignment again instead of having marsh mellows at the bottom of the cup i would put something more soft there because while they were soft at the beginning they became stale and hard by the end.


Technological Resources: we used the given materials for the first drop and the ones that we brought for the second we also used the hot glue guns in the second to keep everything together. we also looked up on the internet what we wanted for ideas.


Biggest Challenges: the biggest challenge for me was getting my idea to work because you may think of something working one way and it works in a completely different way than you think. 


What I Learned: i learned how to use the design process to fix a problem and i learned how  to make my ideas work to the project.

What is Technology

Technology- Human made products and or processes that extend human potential and satisfy human needs.

Three areas of technology are:
-Physical
-Informational/Communication
-Bio-Related

One system is Input->process->output->Feedback->Input the feedback could also go back to the process for more output. this process is an infinite loop until an answer is reached.

The seven resources of technology are:
-Tools/machines/processes
-Materials
-People
-Capitol $$
-Energy
-Time
-Information

The eight steps in the problem solving process are,
Problems- a need is defined
Goals- make them realistic and consider your resources
Research- get the necessary information to solve the problem
Create ideas- brainstorming, put ideas into motion
Select the best idea- rank ideas by how well they solve the challenge using the design matrix
Build- make the design come to life
Test- use the design in real life testing situations
Feedback- evaluate results, consider improvements. does it need more work?  does it solve the problem? go back and make improvements.

Introduction

My name is Alex Calder. I like to play a lot of sports with my friends or just hang out. I am in 10th grade so I will graduates in 2016. Below is a picture of me.

Here are some pictures of technologies new and old.


Any sufficiently advanced technology is indistinguishable from magic.
         -Arthur C. Clarke